
Issuing TRC-20 tokens tutorial
Address: TronLink
2. Prepare an account for issue token
There are three ways to create an account, import an account, and link a hardware wallet. You need to ensure that there are more than 1000 TRX in the account.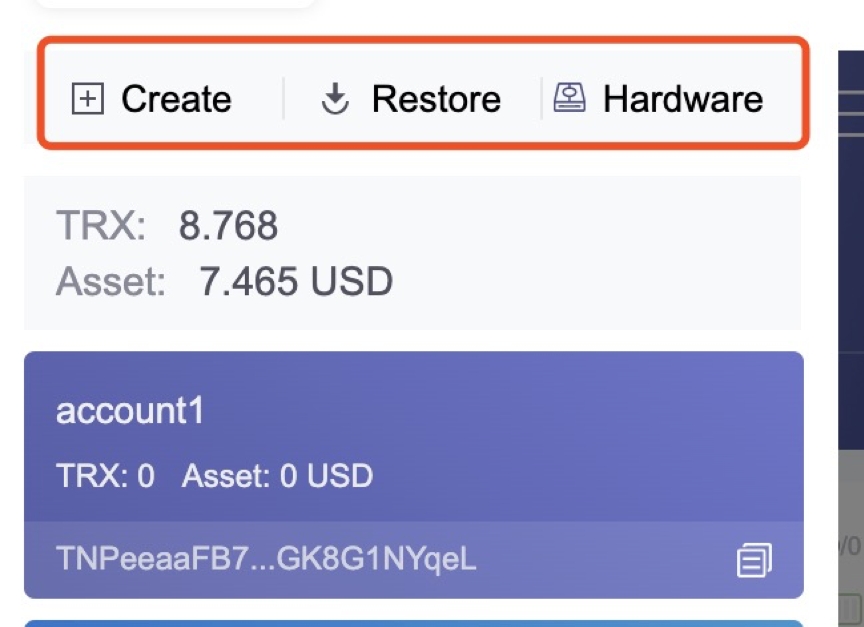
3. Prepare the TRC20 contract code
Trc20 contract template: code
Modify the Token.sol file to define the token name, token symbol, precision, and totalsupply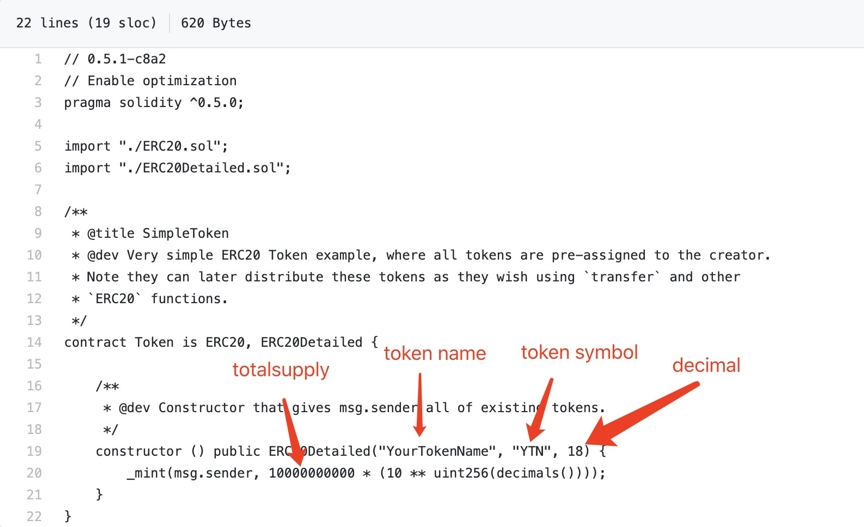
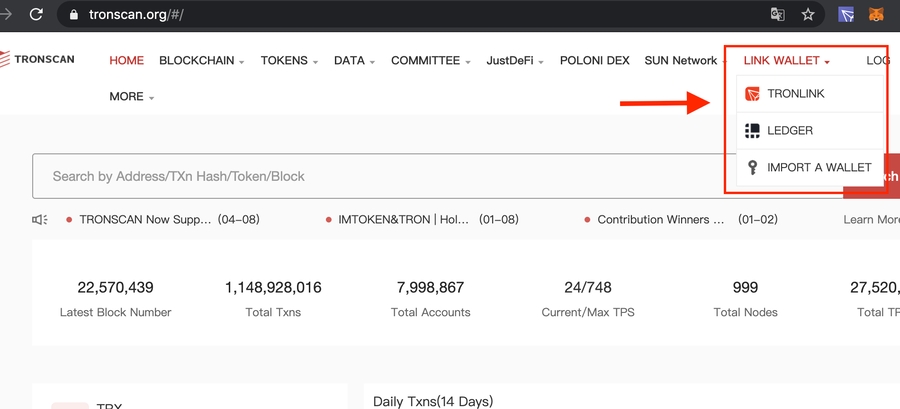
4. Deploy TRC20 contract
Deploy with tronscan: deployment tool
Link wallet
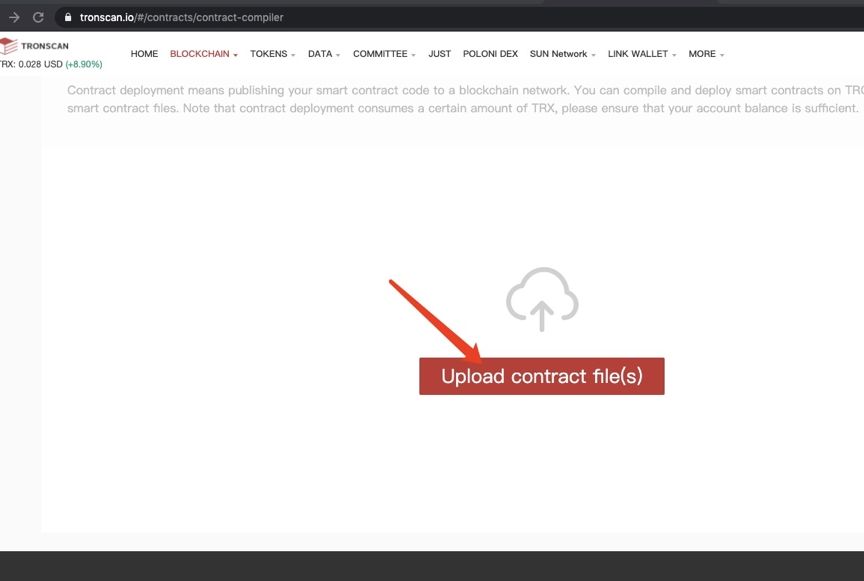
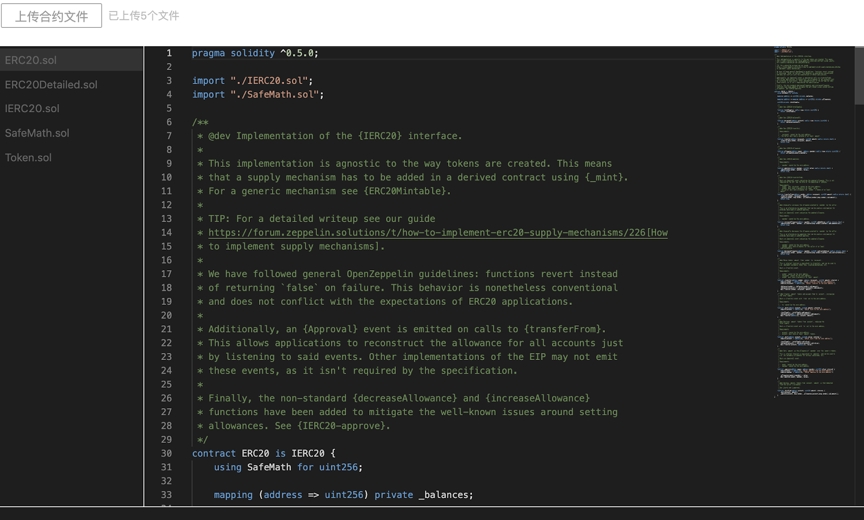
Upload contract code
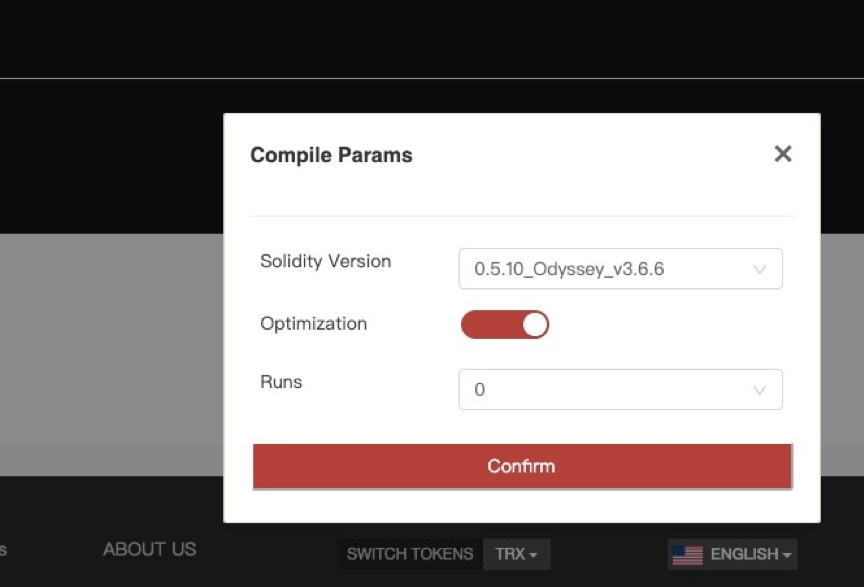
Compile the contract Please select 0.5.10 version compiler

The following prompt appears, indicating successful compilation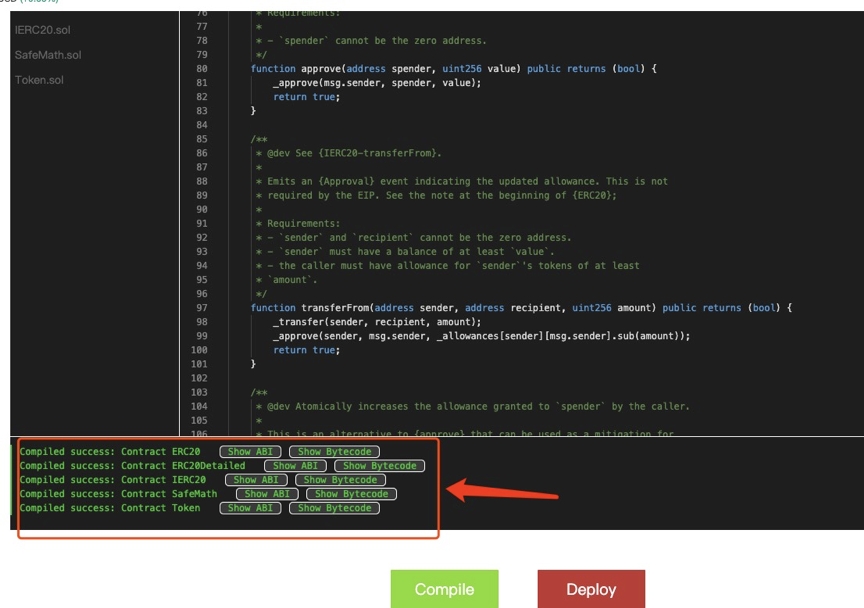
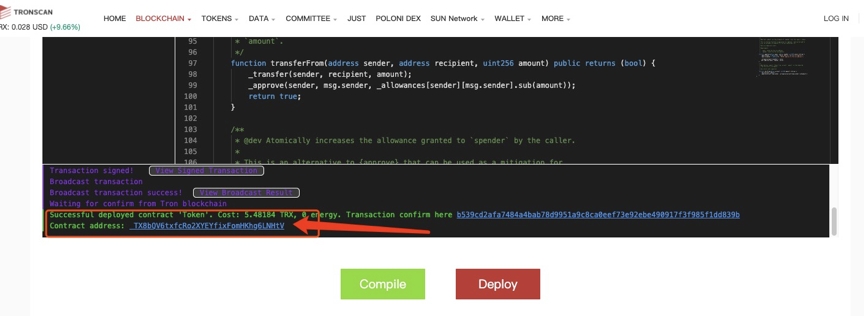
Deployment contract
Please note that you must choose the Token contract, because Token is the main contract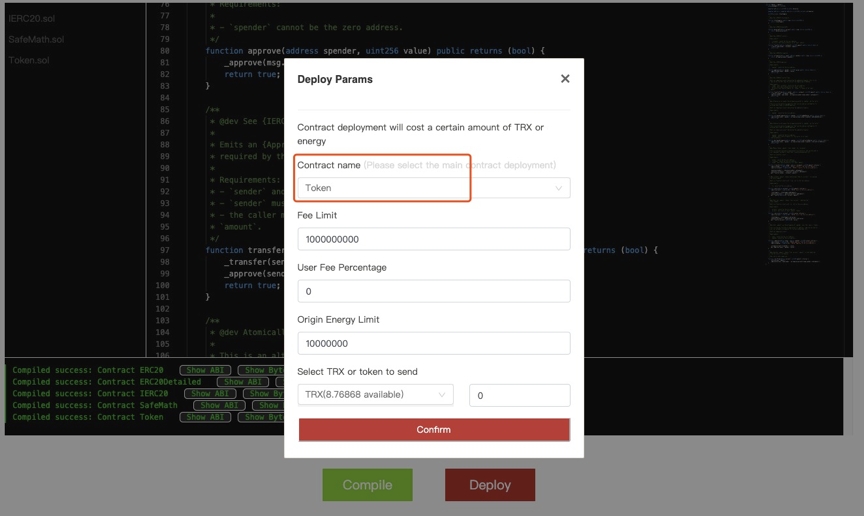
Click Confirm to deploy, the tronlink signature dialog box will pop up, click to accept to sign,when successful deployment, please get the contract address, and record the contract address.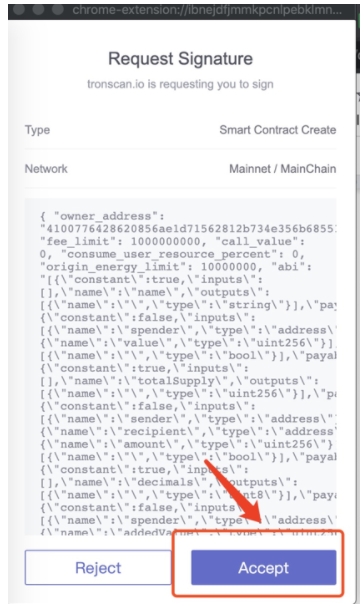
5. Add tokens to Tronlink
On the asset management page, fill in the contract address obtained after successful deployment in the add token input box, the contract just deployed will pop up, click the switch button, and add the token to tronlink. After the addition is successful, the transfer can be carried out.
You can also search the contract homepage on tronscan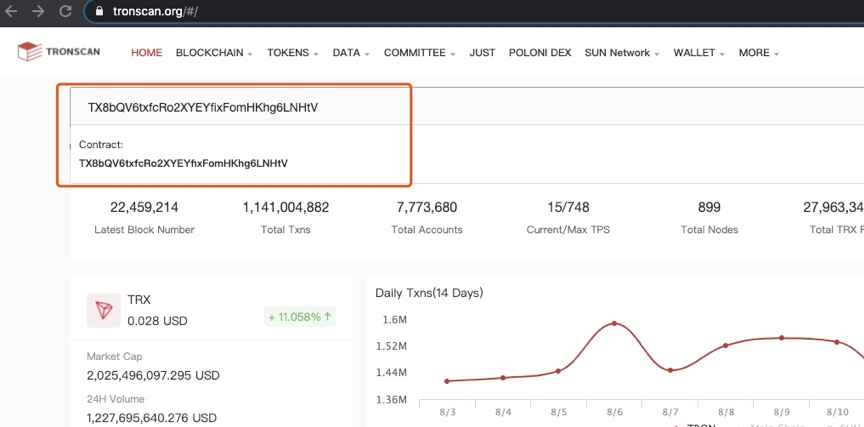
6.Verify TRC20 contracts
Verify with Tronacan: Validation tool
Enter contract information including contract address,contract name, compiler version, License, optimization history and Runs.
Contract address is the address recorded while deploying the contract. Contract name refers to the name of the main contract deployed. In the example above, the name is "Token". Compiler version is 0.5.10 You may select None for License Optimization history is Yes and Runs is 0 by default.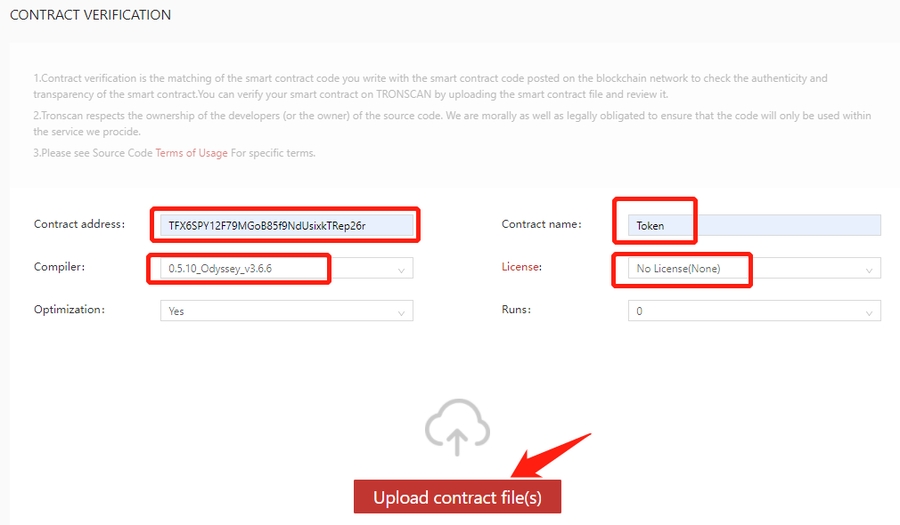
Click Upload contract file(s) for validation.
Upload contract code Check I am not a robot (Note: Google authentication is required for this step. Users in Mainland China may have to use VPN).
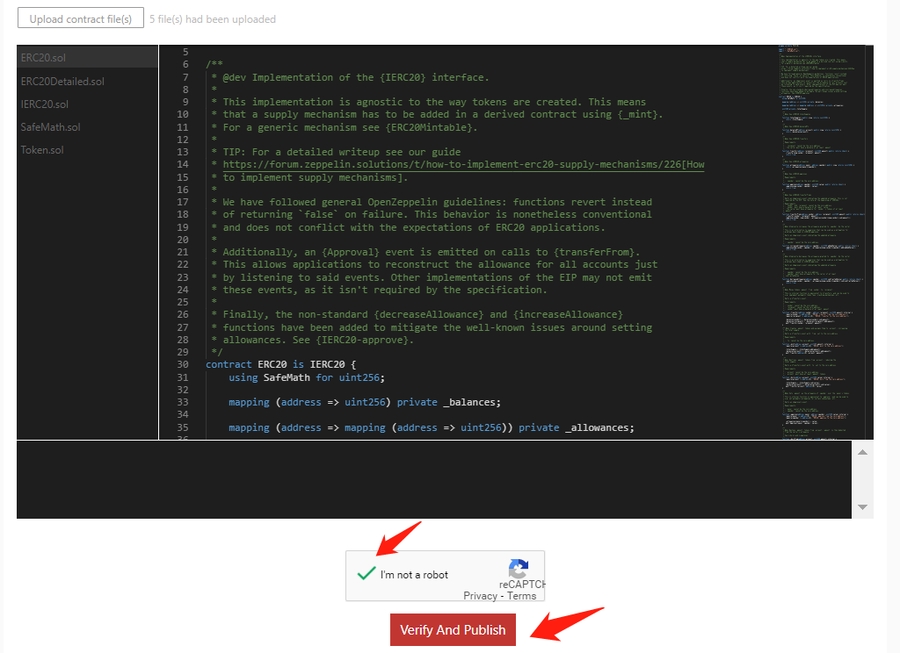
Click Verify and publish, you will be directed to the contract information page once validated successfully.
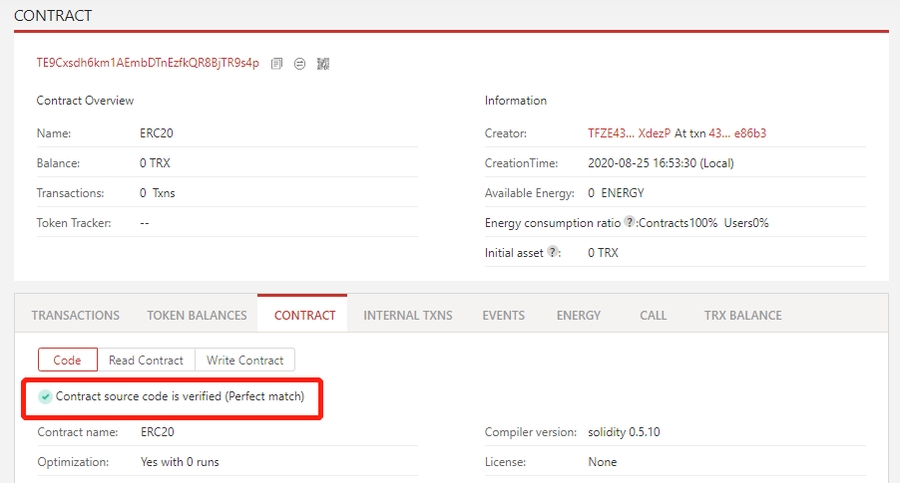
Contract successfully validated Contract information page will show successful validation.
7. Record TRC20 Token
Record with Tronscan: Record tool
Select token type
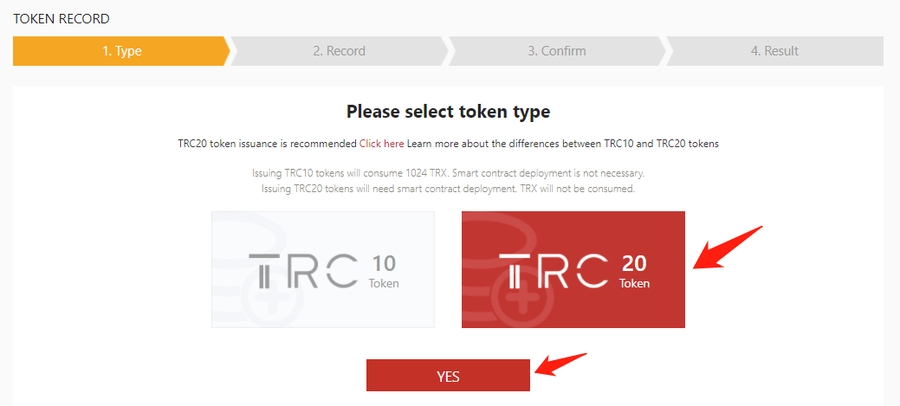
Select the TRC20 token and click Yes.
Enter TRC20 token information Enter the basic information, contract information and social media information of the token. Fields with "*" are required information. The information you entered must match that of the TRC20 contract. Please note that record must be logged in with the deployer address.
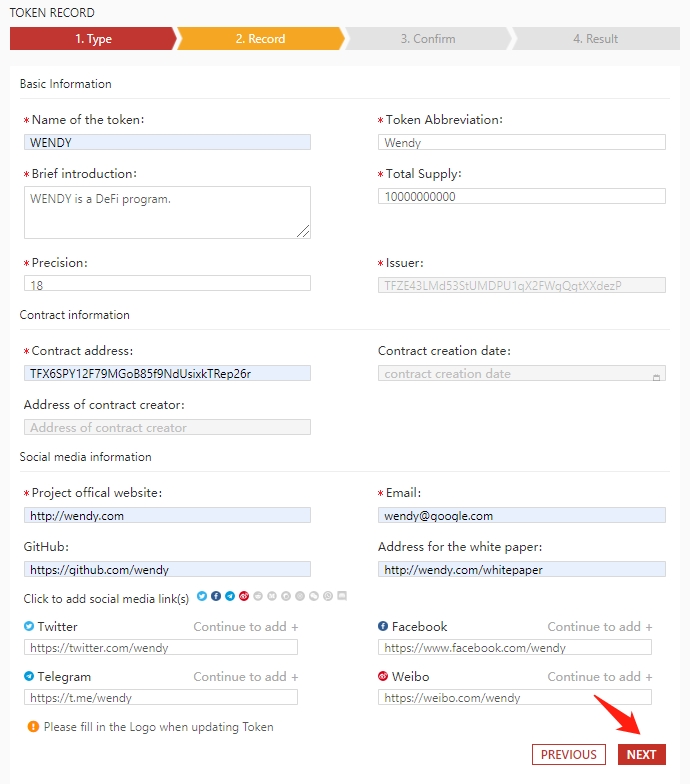
Enter all information required for the TRC20 token, click Next.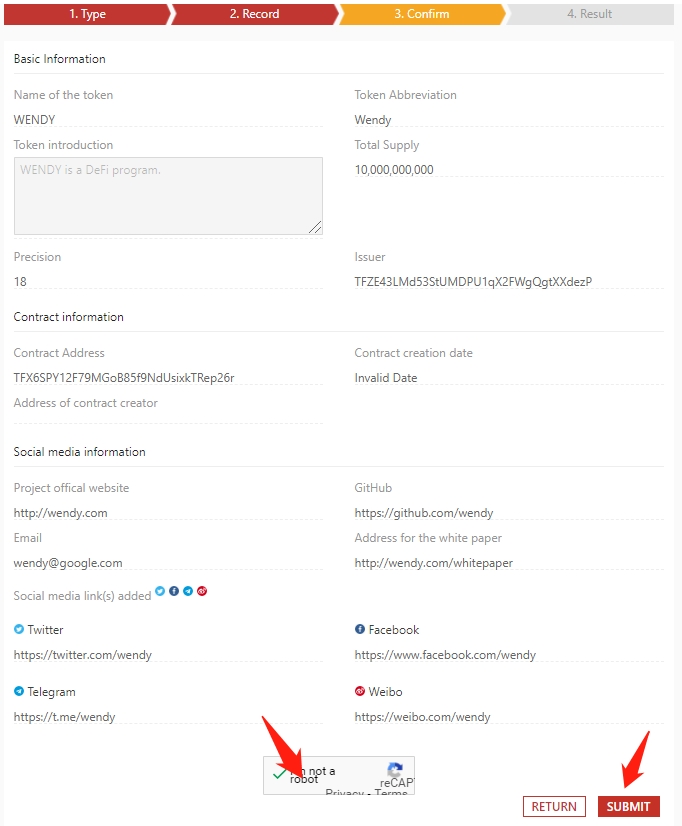
Confirm token information
Check if token information is right. Click I’m not a robot, and then click Submit (Note: Google authentication is required for this step. Users in Mainland China may have to use VPN).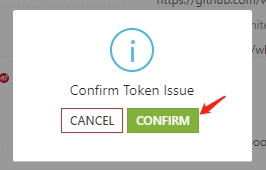
You will see a popup dialog to confirm token issuance. Click Confirm and you will see another popup from Tronlink asking for your signature. Click Accept to sign the message.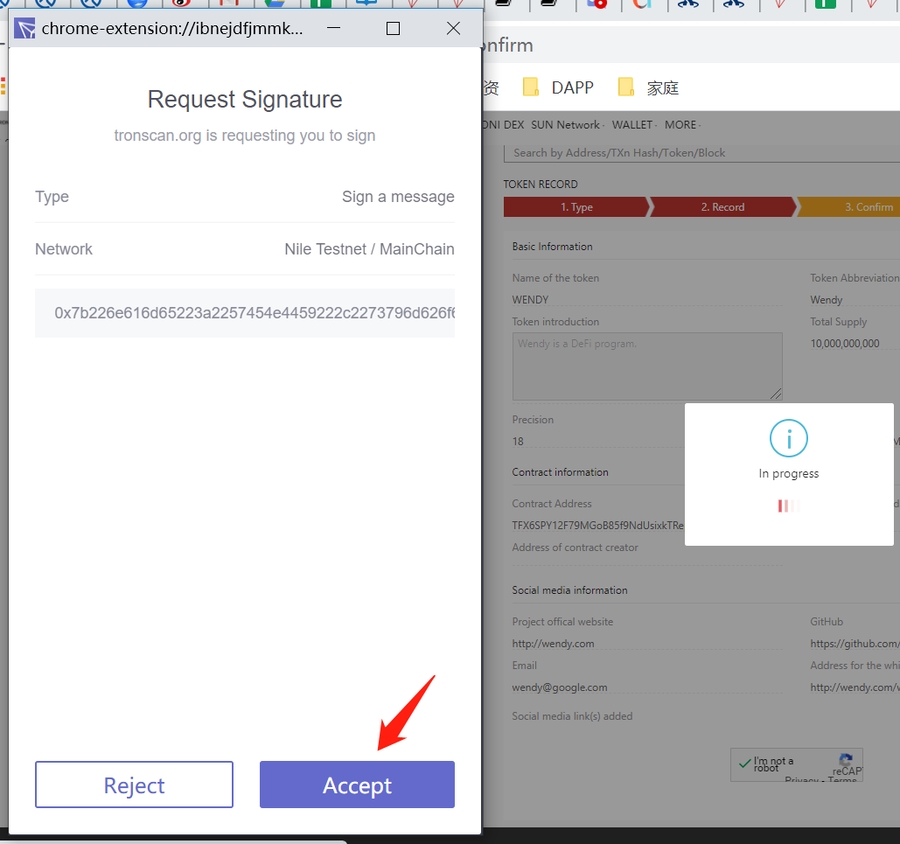
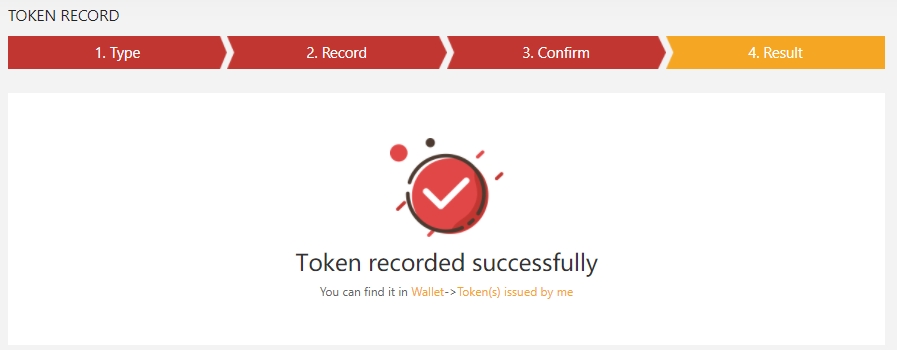
Token successfully recorded
Last updated
Was this helpful?